How To Build A Space Bucket?
Cannabis is popular by many names like pot, bud, ganja etc. If you are a cannabis grower and wish to grow your own weed indoors then you would be interested in learning about the working of a space bucket. In a nutshell, all you need is some extra space and some time. People who need cannabis for medical reasons often find themselves looking for options of self-cultivation. For others, it is just a relaxing pass time that also helps them to save a lot of money that would go in buying the weed.
The cannabis that you use for growing is the dried buds from a female cannabis plant. Of these, also there are some special breeds that are most used for commercial growing purposes. These plants are grown and dried after harvesting. The buds can be used for many different purposes like smoking, vaporising and eating (edibles). The rest is processed for recreational use to make a wide range of products or for medical marijuana.
Materials Needed To Make A Space Bucket
Most of the materials that are needed to make a space bucket are easy to find and also readily available. The following are the items that you will need.
- You will need 4 buckets that are 20 litres each along with a lid. These 5 gallon buckets are size appropriate and you may use taller ones for bigger plants.
- 6 CFL bulbs that are 23 watts in power and also the same number of sockets. The thing that you need to keep in mind is that along with light comes heat and 6 CFL are just enough to maintain the right amount of heat within a space bucket for growing your cannabis plant.
- PC fans atleast 2 and also a 12v power supply. If you are looking for additional cooling then use more numberfor fans.
- Reflective paint preferably white colour or Mylar.
- Black masking tape.
- A 24 hour timer that is connected so that the lights get turned on and off automatically.
- A power strip that has adequate power surge protection.
- Stationary items like wire, glue and some tools which are there in almost all households.
How To Make Your Space Bucket
STEP 1:
The first step is to make your casing for the space bucket. This is done by making holes in the bottom for the water to drain out. You can make theholster easily using a screwdriver that is heated.Insetting it into the base when hot will make the perfect hole. The next step is to place your bucket straight and put in a layer fo rocks at the base so that the holes do not get clogged with the soil.
STEP 2:
Apply reflective material on the inside walls of the bucket. You may skip this step if you are using white buckets. Do not use aluminium foil here.
STEP 3:
Make your bucket black from the outside so that no light enters inside. You can do so by using black paint or tape so that there is no light leaked at all.
STEP 4:
Make an exhaust system. This can be done by making two holes on opposite sides of the primary bucket. The size that is cut should be good to hold the exhaust fans like an 8×8 or 12×12. Once you have placed the fans in the proper place, connect them to a 12 v power supply. Ensure that the power supply is standard with 1A and is enough for one or two fans. Of these one fan will work as intake and one as output or exhaust.
STEP 5:
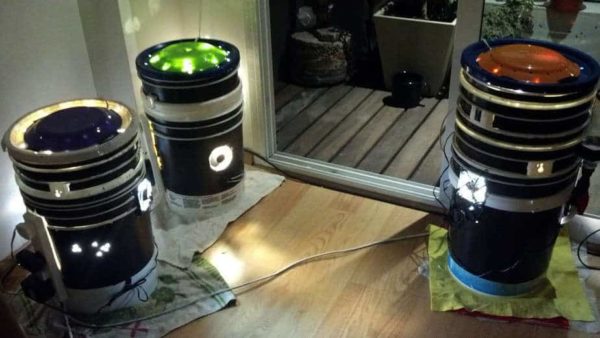
Place the light bulbs horizontally across the lid of the bucket so that the plants get maximum light. If the heat from the lights is too much then you can place an additional exhaust fan. After you have made the necessary wire connections, place a lid on top and secure it in place.
STEP 6:
Make sure to glue the power strip to the bucket side so that you can connect the lights, timer and the fans. Lastly cut the top portion of all the buckets and stack them to get a proper height. Make sure that the entire space created by you is light proof by using a lot of black tape and black paint.
The final step is to connect the timer, lights and the power supply to the power strip and plug the strip into a socket. Then just put on the switch and you are all set to begin the journey of indoor cannabis growing with your functional personal space bucket.
May 4, 2018